How to purify raw beeswax at home? Whether you’re a beekeeper with frames of raw wax or a crafter who’s purchased unprocessed beeswax, turning that dirty, debris-filled substance into clean, usable wax is easier than you might think.
As a fifth-generation beekeeper at Sweet Comb Chicago, I’ve purified countless pounds of beeswax using simple household tools. Today, I’ll walk you through the entire process step by step.
What Raw Beeswax is and Why Purification Matters
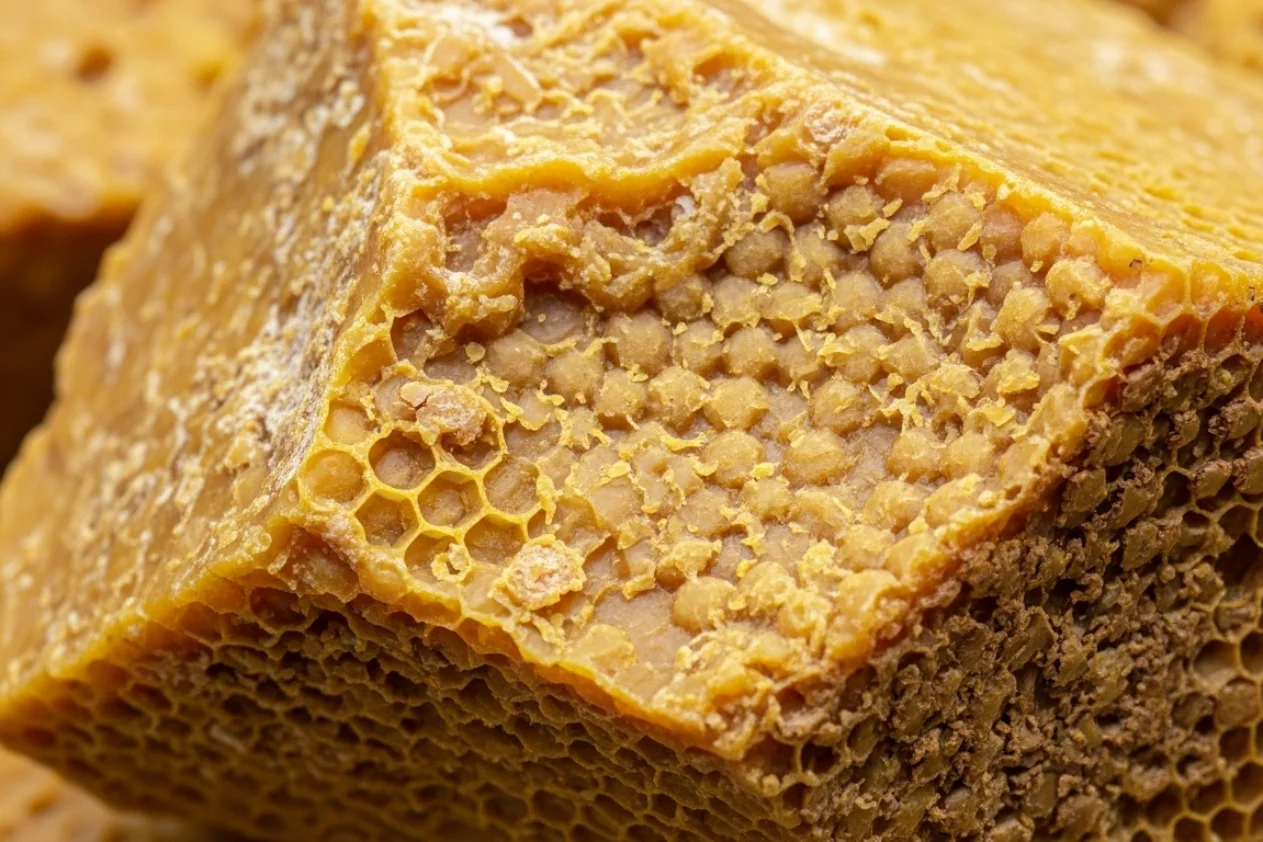
Raw beeswax straight from the hive is far from the golden, clean material you need for crafting. It’s actually packed with all sorts of stuff you don’t want in your final product; a reality every beekeeping enthusiast quickly learns. What you’ll typically find in raw beeswax:
- Honey residue – sticky remnants clinging to the wax
- Propolis – the resinous substance bees use as glue
- Dead bees and larvae casings – not exactly craft-friendly
- Pollen particles – can affect color and texture
- Pesticide residues – an unfortunate reality of modern beekeeping
Purification isn’t just about aesthetics—it’s essential for any project. According to a PMC Industrial-Scale Decontamination Study, properly filtering raw beeswax can reduce pesticide contamination by up to 96.7% in just two cycles. That’s why mastering beeswax purification techniques is so important.
Clean wax makes all the difference in your projects:
- Burns better in clean beeswax for candles with a cleaner flame
- Creates smoother cosmetics and beeswax for hair products without gritty texture
- Provides better results in woodworking and leather treatments
The purification process transforms a crude material into a valuable crafting ingredient that’s actually enjoyable to work with.
Essential Supplies for Purifying Beeswax
Before you begin the beeswax cleaning process, gather these basic tools for a successful purification:
- Large pot (stainless steel or aluminum, never use your good cookware)
- Heat source (stove, hot plate, or even a solar wax melter setup)
- Thermometer (to monitor temperature and ensure you’re at the proper beeswax melting point)
- Cheesecloth, old t-shirts, or specialized filters for removing debris from beeswax
- Rubber bands or string
- Containers for molding (silicone works best for storing purified beeswax)
- Water
- Protective gear (gloves, apron)
For cleaner wax and more effective beeswax filtering methods, consider these additional items:
- Double boiler setup (reduces fire risk during rendering beeswax)
- Fine mesh strainers of different sizes
- Dedicated wooden stirring utensils
- Heat-resistant silicone spatulas
- Paper coffee filters for final filtering, essentially a homemade beeswax filter system
Safety Precautions When Working with Beeswax
Beeswax is flammable and can reach temperatures that cause severe burns. Let’s be real—this isn’t something to mess around with. Always prioritize safety with these precautions:
Critical safety rules you can’t ignore:
- Never leave melting beeswax unattended – It can reach its flash point (around 400°F/204°C) faster than you’d think if it overheats.
- Keep a fire extinguisher nearby – And here’s the kicker: never use water on a beeswax fire, as it will actually spread the flames.
- Work in a well-ventilated area – You don’t want to be breathing fumes, especially if your wax contains unknown residues.
Step 1: Harvesting and Preparing Your Beeswax
Start by breaking your raw beeswax into smaller pieces. Think of it like chopping vegetables—smaller pieces mean more surface area and more even melting.
If you’re working with cappings or frames, scrape off as much honey as possible first. The less honey in your wax, the easier the purification process will be.
Removing Excess Honey
Here’s a simple but effective trick: rinse your wax pieces in cool water to remove surface honey. Don’t stress about getting every last drop. The water bath method we’ll use later will help separate any remaining honey during melting.
According to the International Journal of Research Studies in Biosciences, manual extraction methods recover an average of 32.2% pure beeswax from crude wax, so proper preparation maximizes your yield.
Step 2: Initial Melting and Debris Removal
Fill your pot about 1/3 full with water, then add your raw beeswax pieces. The water creates a buffer that prevents the wax from burning.
Heat the mixture slowly until the wax completely melts, which typically occurs around 145°F (63°C).
The First Melt Benefits
This initial melting serves several purposes:
- The water helps separate the honey and water-soluble impurities
- Heavier debris sinks to the bottom
- The wax floats to the top, creating a natural separation
Once fully melted, remove from heat and let it cool completely, usually overnight. The wax will form a solid disc on top of the water, with debris trapped underneath.
Step 3: Filtering the Melted Beeswax
After your wax has solidified, remove the disc and scrape off any debris from the bottom. This is your first level of filtration.
For the second melting, you have two options:
- Repeat the water bath method for very dirty wax
- Use a double boiler for cleaner wax
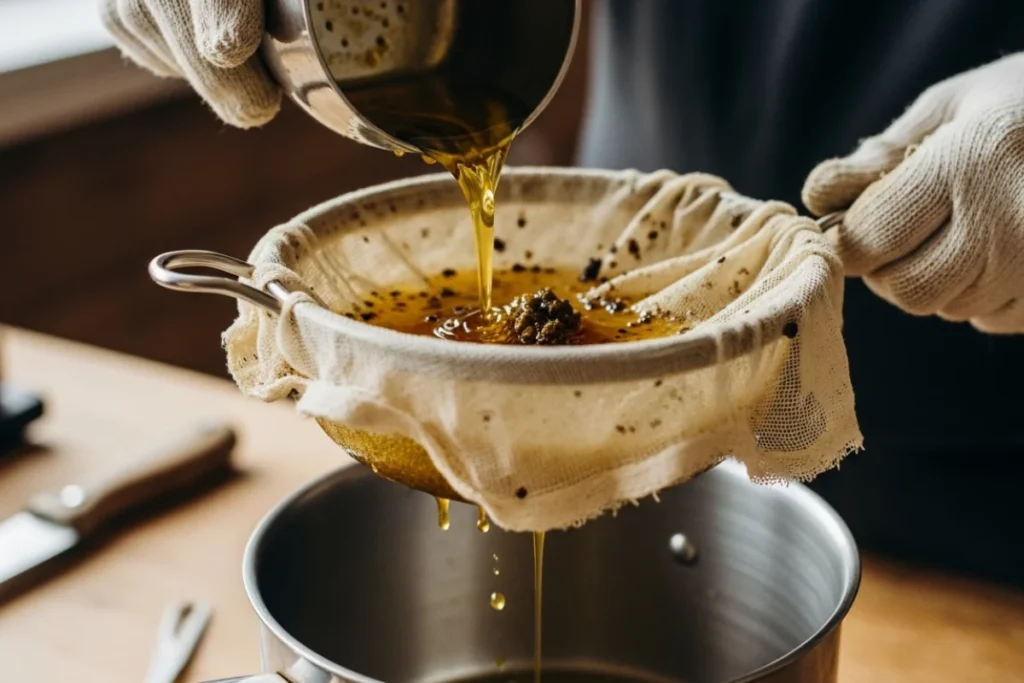
Setting Up Your Filter System
Prepare your filtering system while the wax remelts:
- Stretch cheesecloth or an old t-shirt over a heat-resistant container
- Secure with rubber bands or string
- Consider doubling or tripling the layers for finer filtration
Pour the melted wax through your filter slowly. The filter will catch remaining particles and debris.
If you’re using our 100% Natural beeswax pellets instead, you can skip directly to your projects, as they’re already triple-filtered for purity.
Step 4: Second Filtering for Ultra-Clean Wax
For projects requiring extremely pure wax, a second filtering makes all the difference.
Remelt your filtered wax using a double-boiler method. Keep temperatures between 160-170°F (71-77°C) for optimal flow without scorching.
Fine Filtering Techniques
For this stage, use finer filtering materials:
- Paper coffee filters (pre-warm them to prevent wax from solidifying)
- Fine mesh paint strainers
- Multiple layers of tightly woven fabric
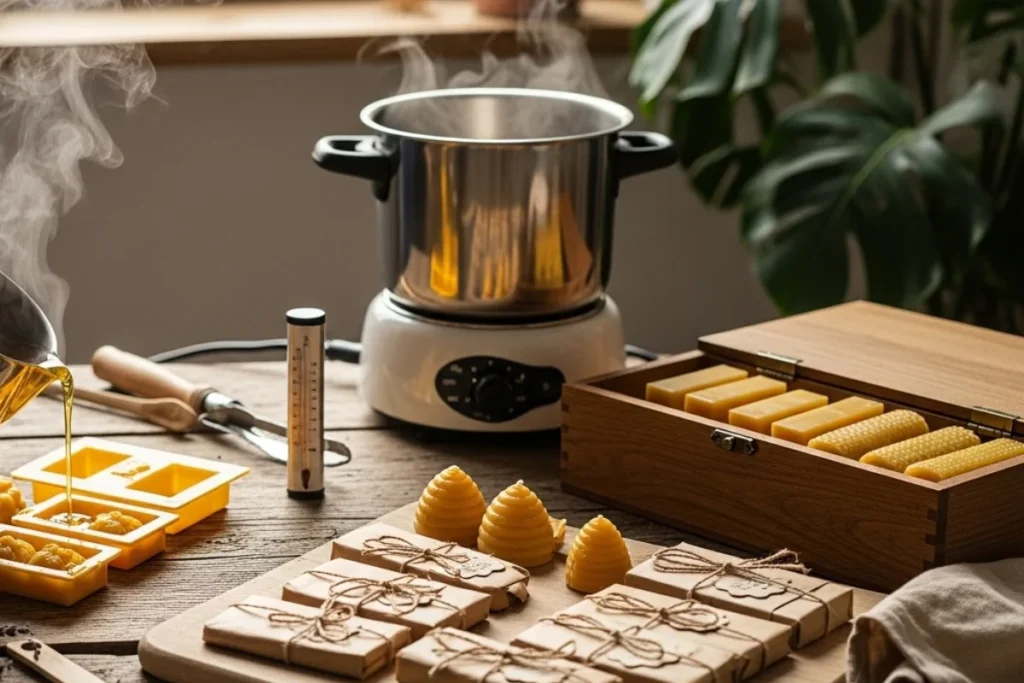
Step 5: Molding and Storing Your Clean Beeswax
Once filtered to your satisfaction, pour the clean wax into molds. Silicone molds work best as they’re flexible and release the wax easily.
Allow the wax to cool slowly at room temperature. Purified beeswax requires about 12 hours of cooling time for complete solidification and separation from any remaining impurities.
Storage Best Practices
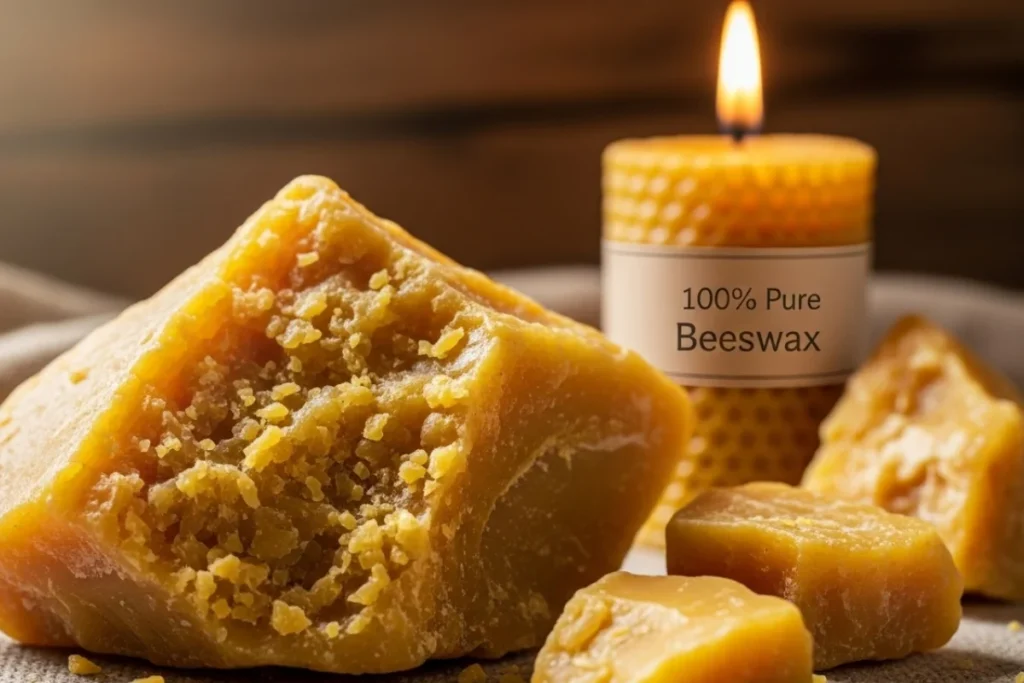
Store your purified beeswax in a cool, dry place away from direct sunlight. Properly stored, beeswax can last indefinitely without losing its properties.
For easy future use, consider molding your wax into small, manageable pieces. At Sweet Comb Chicago, we offer beeswax pellets for this exact reason—they’re easy to measure and melt.
Different Methods for Purifying Beeswax
Water Bath Method
The water bath method is ideal for beginners and those with very dirty wax:
- Melt wax in water
- Allow to cool and solidify
- Remove the wax disc
- Scrape debris from the bottom
- Repeat if necessary
This method naturally separates water-soluble impurities and allows debris to sink away from the wax.
Double Boiler Method
For cleaner wax or second filtrations, the double boiler provides more temperature control:
- Place wax in a smaller pot or metal bowl
- Set this inside a larger pot with water
- Heat the water, not the wax directly
- Maintain temperatures between 145-175°F (63-80°C)
This method prevents scorching and provides consistent heat for better filtering.
Solar Melter Method
The solar method is eco-friendly and surprisingly effective:
- Place wax in a container with a glass lid
- Position in direct sunlight
- Allow the sun to slowly melt the wax through a filter
Troubleshooting Common Issues
Discolored or Dark Wax
If your wax remains dark after filtering:
- Try adding activated charcoal during melting
- Expose thin layers to sunlight (natural bleaching)
- Consider adding a small amount of white beeswax to lighten the color
Persistent Odors
Some regional honey sources create stronger scents in wax. For stubborn odors:
- Add a drop of essential oil per pound of wax
- Try the water bath method with a tablespoon of baking soda
- Accept that some wax will retain a honey scent (which many find pleasant)
Wax Won’t Solidify Properly
If your wax remains soft or sticky:
- Check for remaining honey contamination
- Ensure complete cooling (12+ hours)
- Verify you’re working with pure beeswax, not a blend
Creative Uses for Your Purified Beeswax
Your beeswax is clean and ready to use. Here are common uses of beeswax:
- Candle making (pure beeswax candles burn longer and cleaner)
- Natural cosmetics like lip balm and lotion bars
- DIY beeswax wraps for eco-friendly food storage
- Furniture polish and leather conditioner
- Waterproofing for boots and outdoor gear
- Beeswax for hair products and styling
At Sweet Comb Chicago, we use our triple-filtered beeswax in all our beeswax products, from beard conditioners to candles.
Beeswax in Personal Care
Purified beeswax is a game-changer for natural personal care products. It’s not just trendy; there’s real science behind why it works so well.
Why beeswax excels in personal care:
- Natural antibacterial properties – Helps protect your skin from harmful bacteria.
- Creates a protective barrier – Locks in moisture without clogging pores.
- Completely natural – No synthetic chemicals or mystery ingredients.
Here’s something cool: our beard conditioners and balms at Sweet Comb Chicago use the same purification techniques I’ve just shared with you. We’re not cutting corners or using industrial shortcuts, just honest, careful processing to ensure the highest quality product touches your skin and hair.
Purify Your Own Beeswax from Scratch
Learning how to purify raw beeswax at home is more than just a DIY project; it gives you access to a versatile, natural material while saving serious money.
With just a few simple tools and some patience, you can transform raw, dirty wax into a premium crafting ingredient that rivals anything you’d buy in a store.
The keys to your success:
- Temperature control – Keep it steady, keep it safe
- Proper filtering – Don’t rush this step
- Patience – Good things take time
Take your time with the process, follow those safety precautions religiously, and enjoy the genuine satisfaction of creating something truly from scratch. There’s something special about working with a material from start to finish.
Whether you’re making candles that fill your home with warmth, cosmetics that pamper your skin, or furniture polish that brings out the beauty in wood, your newly purified beeswax will provide superior results to commercial alternatives.
And here’s the best part: you’ll have the knowledge and pride that comes from processing it yourself, from hive to home. That’s worth more than any store-bought product.